OFF POS
- Home
- Articles
The Installation section provides step-by-step instructions for installing the software on your server and local environment. Before proceeding with the installation process, please ensure that your server meets the minimum requirements outlined below. Following these guidelines will help ensure a smooth and successful installation of the software.
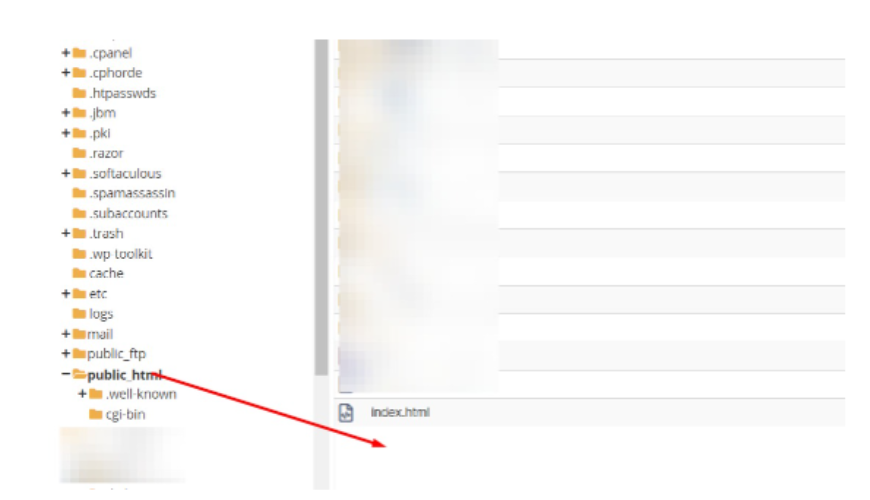
1. Upload your downloaded zip file and extract it on the root path of your server. Or you can create a new folder or subdomain and upload it there, like: public_html/off_pos or off_pos.your-domain.com.
2. Go to your browser and enter the URL where you have uploaded the source code and access the installer in this way like: yourdomain.com or yourdomain.com/off_pos or http://off_pos.yourdomain.com/ As it is not installed yet, it will bring you to the installation page directly.
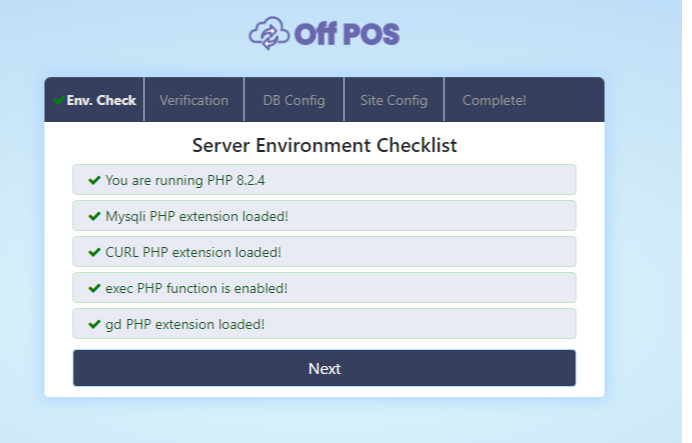
3. After clicking on the next button you will get an interface about "Verify your purchase", enter your purchase username and code after that click on the "Next" button.
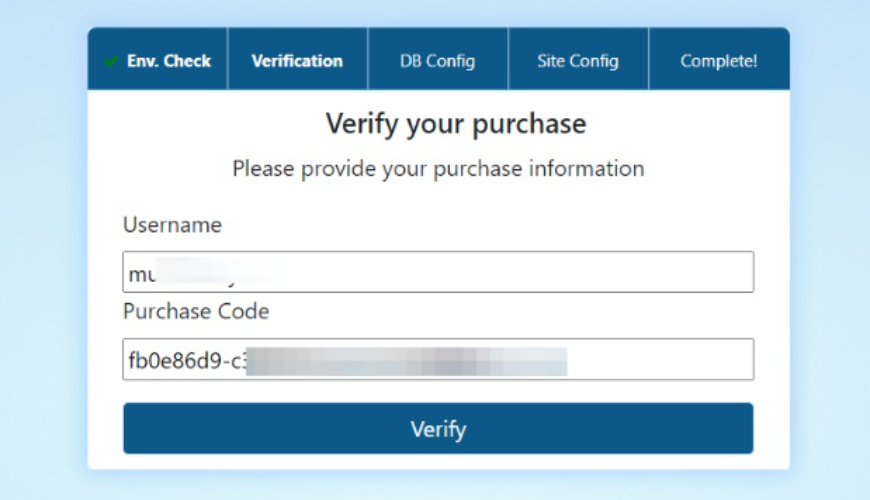
4. After successfully passing the purchase verification step, you will get an interface to enter database username, password and database name. So follow the next steps to create database name, username and password.
- Go to your server and click on Manage My Databases.
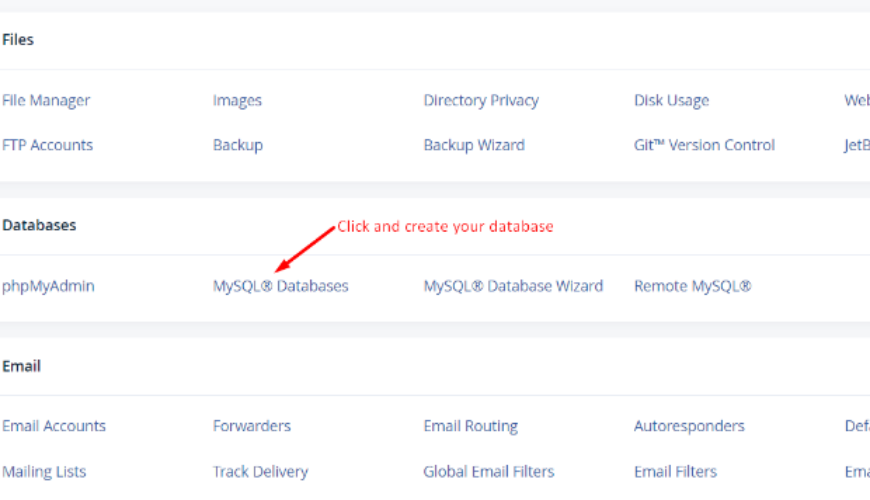
5. Enter your database name and create a database.
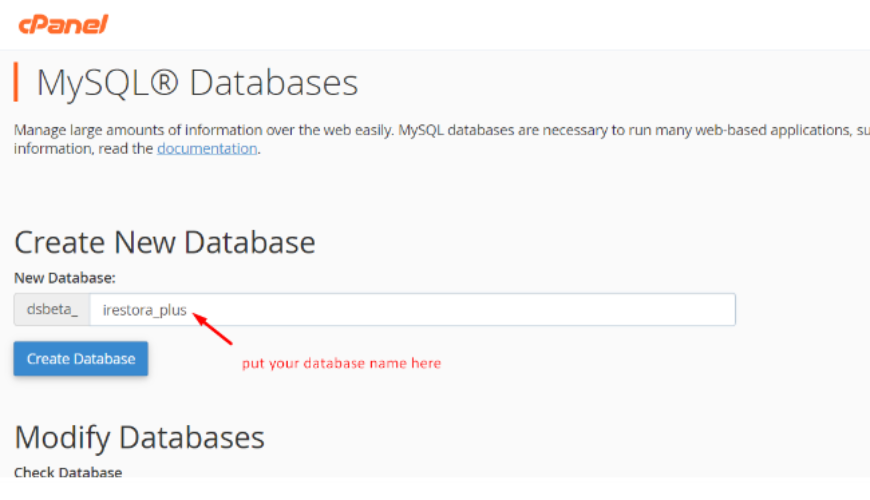
6. Keep the database name, database username, and password in a text editor.
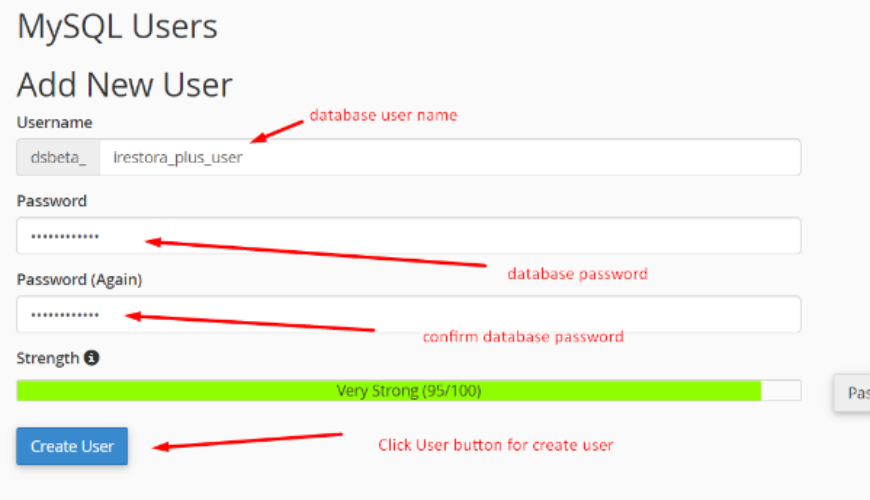
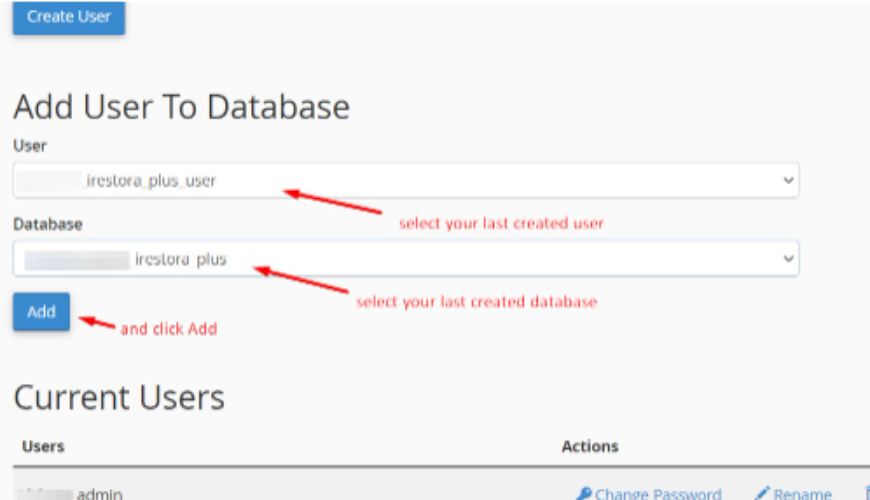
7. Find Add User to Database to assign the newly created user to the database. Select your database user and database.
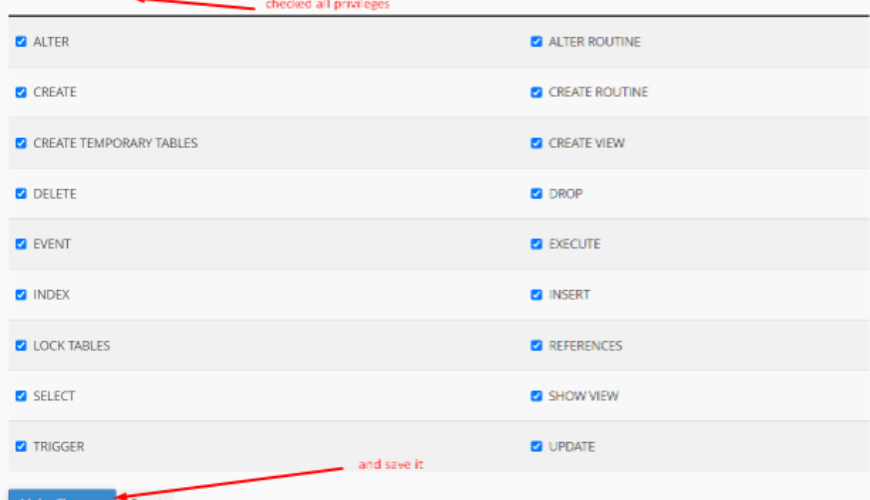
8. After clicking on the Add button check all privileges for your database user.
9. Now come back to the installation tab of your browser and enter the database configuration data and click Next.
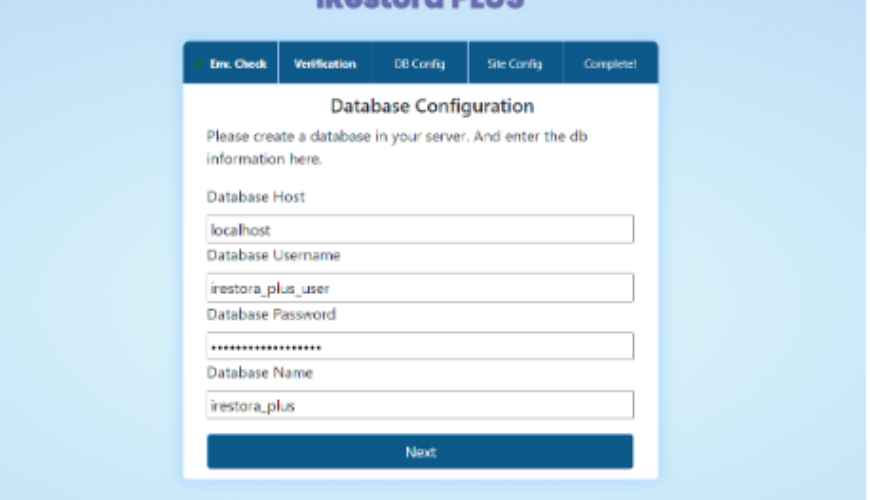
10. After clicking on Next it will be shown as a screenshot and click on Next again for the next step.
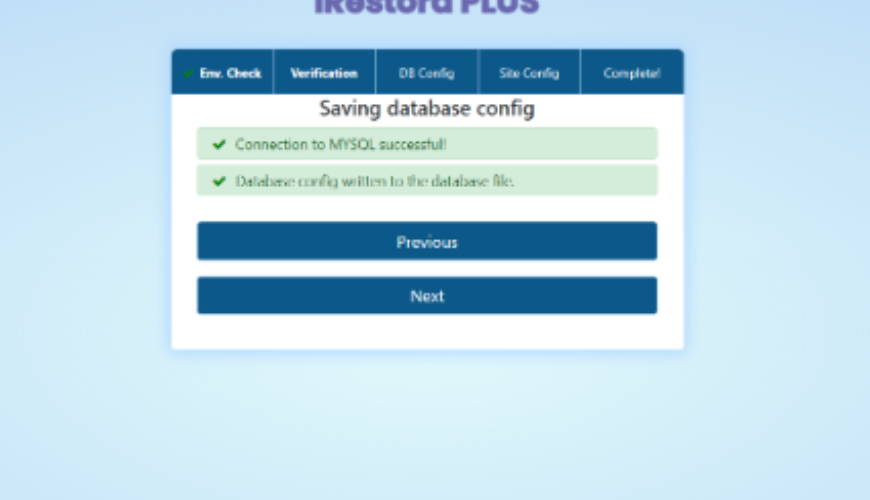
11. After Clicking on the Next button it will be shown as a screenshot and click on Next.
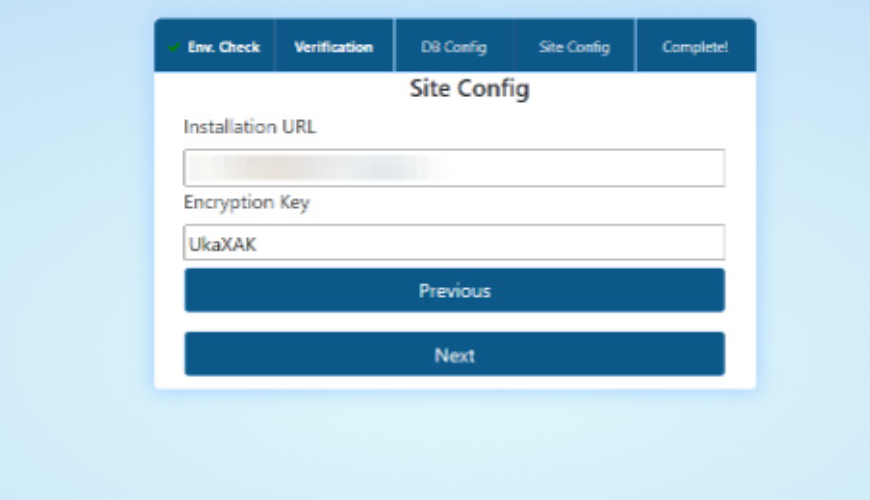
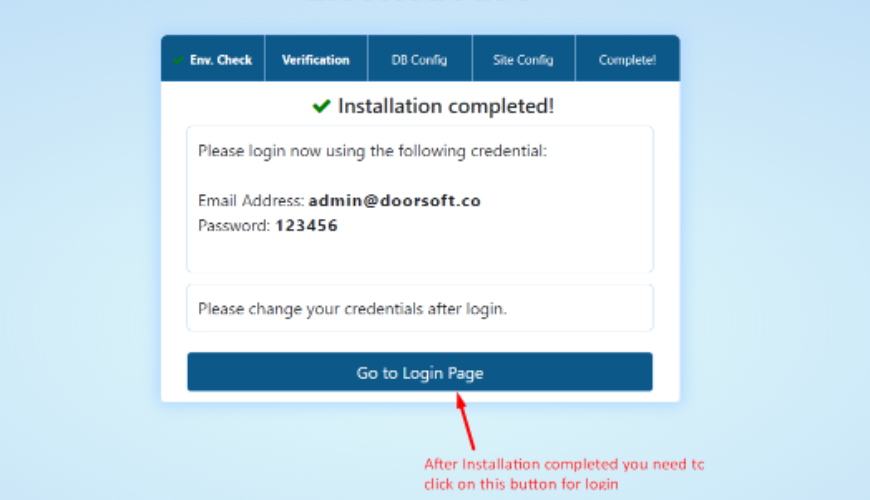
12. After clicking on the Next button it will be shown like this screenshot and click on Next.Installation completed.
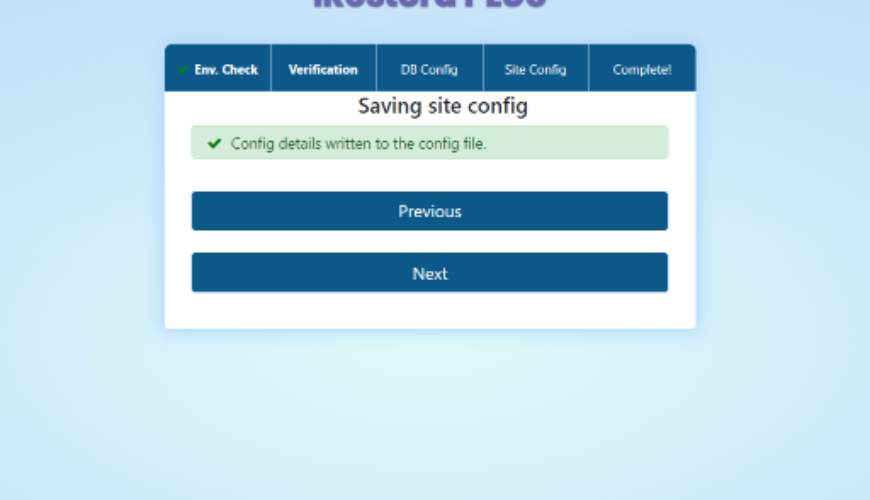
13. After the installation is complete you will see an interface like below.
To login click on the "Go to Login Page"
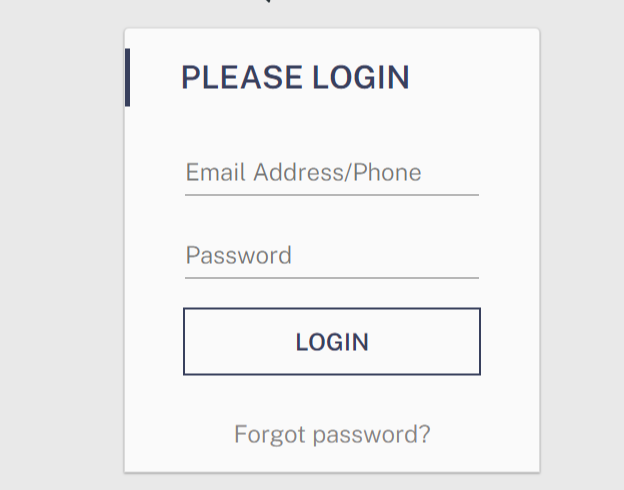
14. Finally, run the script by accessing your-domain.com OR your-domain.com/spescho/ OR http://spescho.your-domain.com/ .
Was this page helpful?
Thank you for your feedback!
Please Login First
Comments (00)